
I'm so excited about my first tutorial today. It was inspired by Disney over at Ruffles and Stuff, and the cuffs and collar that she made, but mine are a little different....and maybe a little bit fashion forward. Sounds intense right? But it's really not. So, here we go.
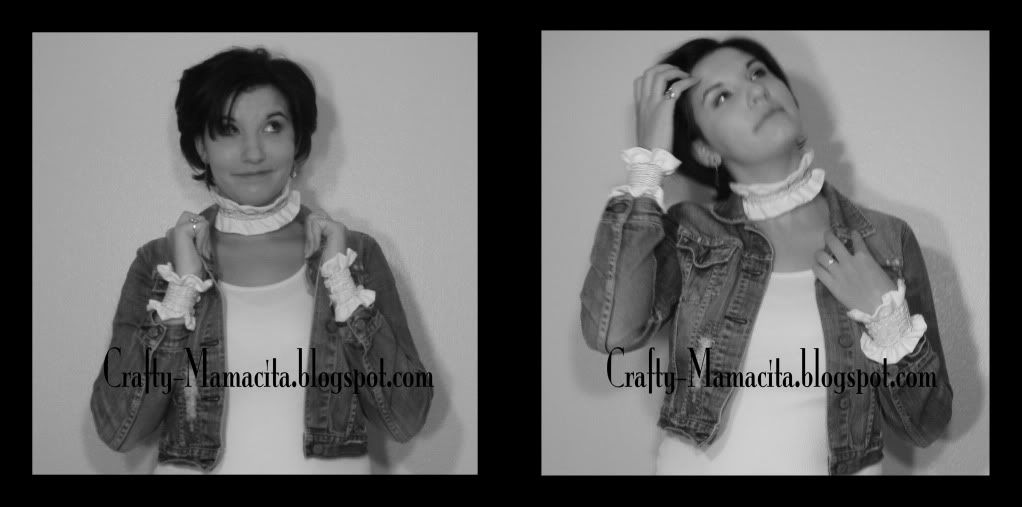
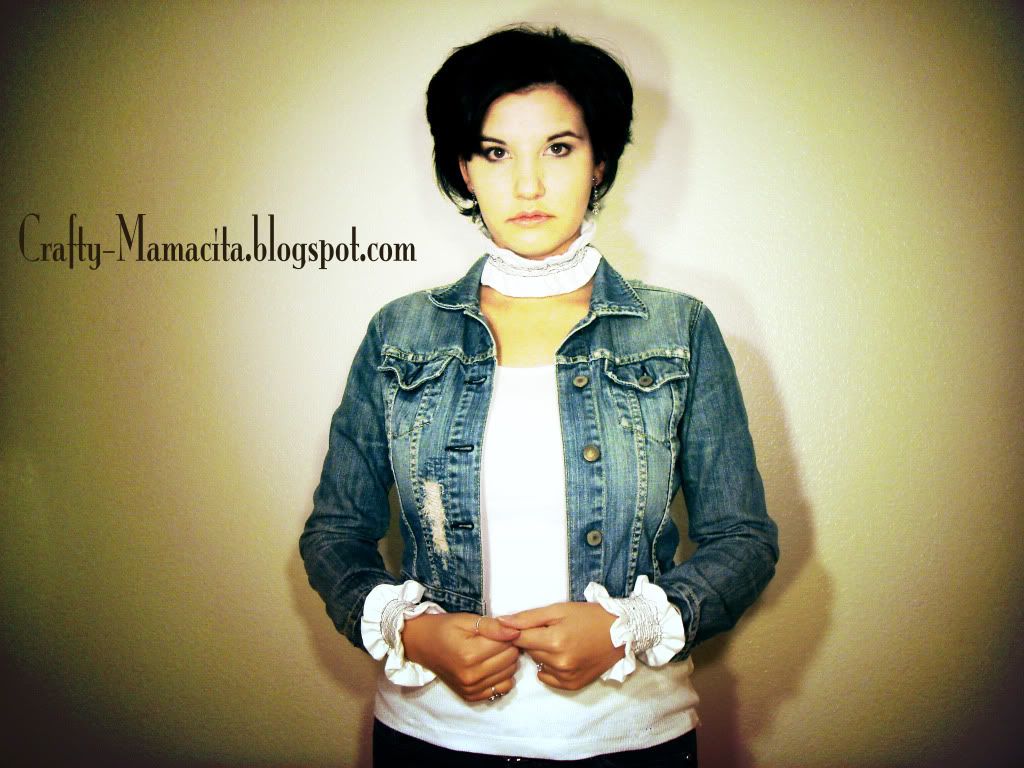
This is how they turned out. You like?
I think I was getting a little too serious during our fun little photo shoot. ;)

To start I took:
* Scraps of white linen fabric
* 5 white buttons (small)
* White thread, and black thread
Yep, that's it.
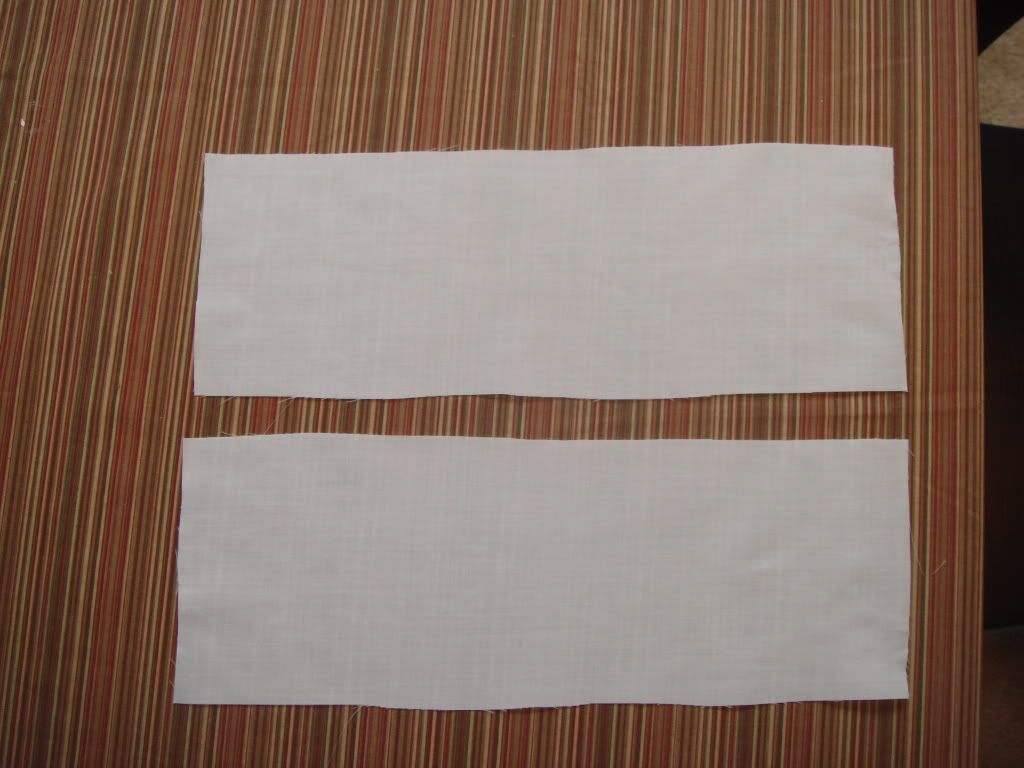
First I cut two pieces that were 4.5'' x 14''
(allowing for 1/2'' seam allowance)
(Two pieces are for one cuff only. You'll actually want 4 pieces total for two cuffs)
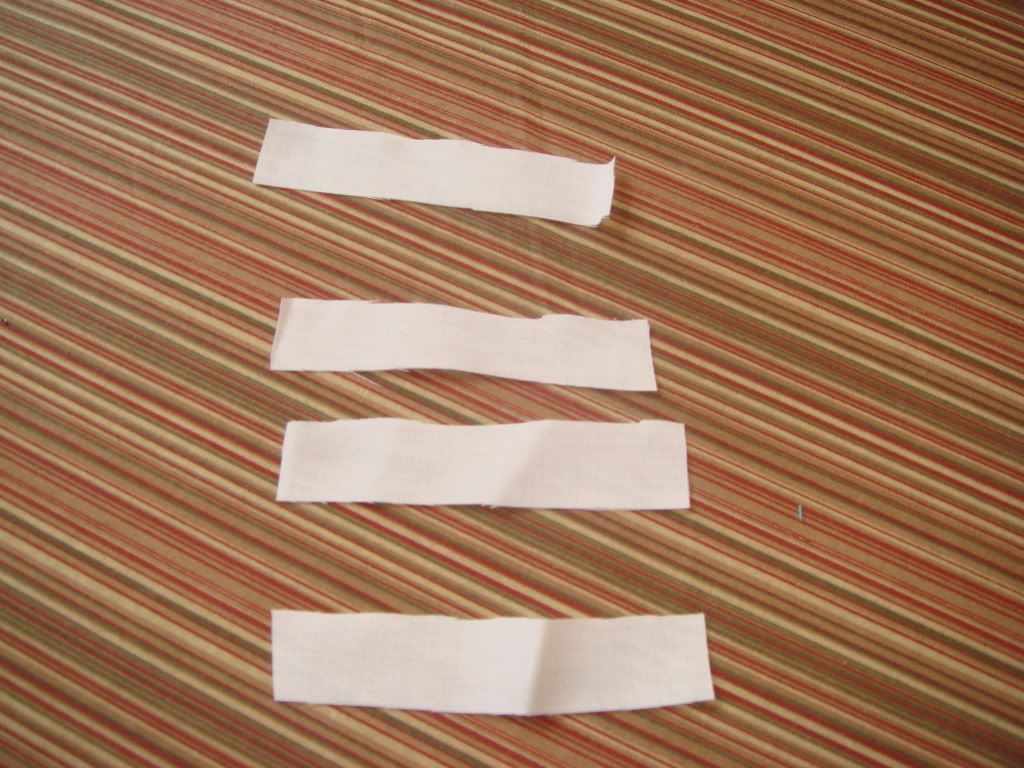
Then I cut 4 strips 2'' x 1/2''
Two strips per cuff, so you need four total, then one more for the collar.
These will be the loopies for your button to go through.
Then I folded each strip in half lengthwise and sewed a straight stitch close to the open edge.
I went over the edge again with a zigzag stitch.
I left it with the slightly frayed look, 'cause that's what I was going for.

I folded it with the frayed/zigzag side facing out, just like so.
*Side-note: please forgive the horrible tablecloth, we got it when we first got married and we never use it, but it's waterproof so it's now my crafting tablecloth. Joy!*

I then pinned my little 'loopies' to the end of the fabric at 1'' down from each long side, facing inward.

I placed the other piece of fabric on top of that one with the 'loopies', and pinned it.
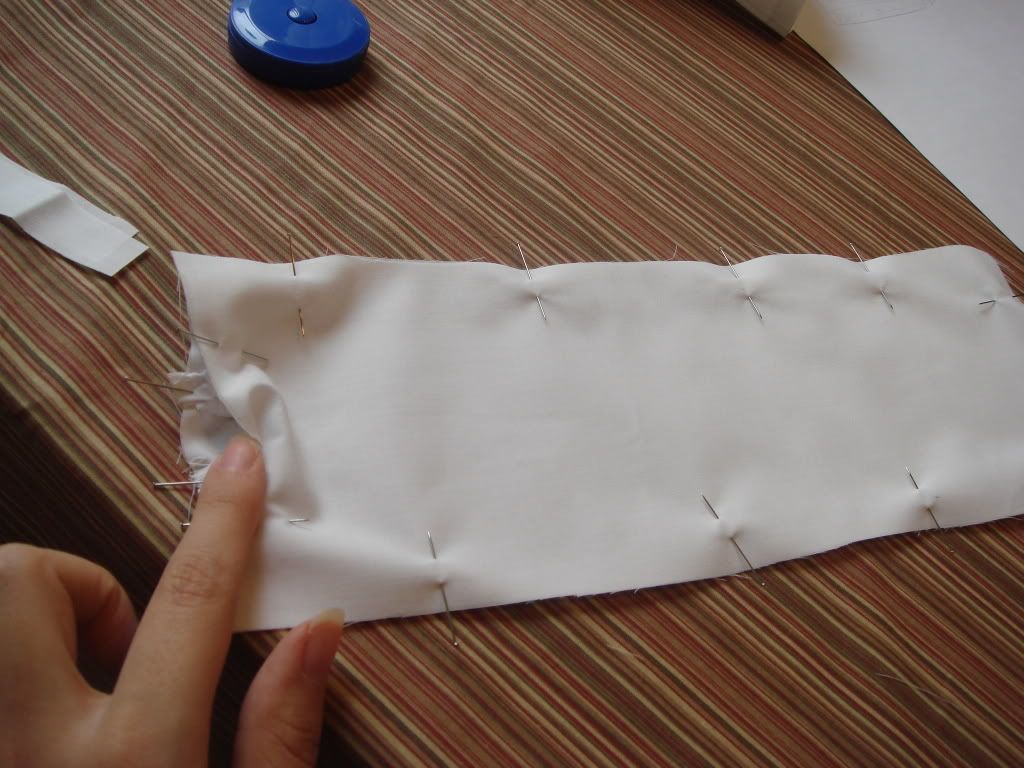
I stitched nearly all the way around, I left a little opening to fold it inside-out...or would it be rightside-out? You know what I mean, right.
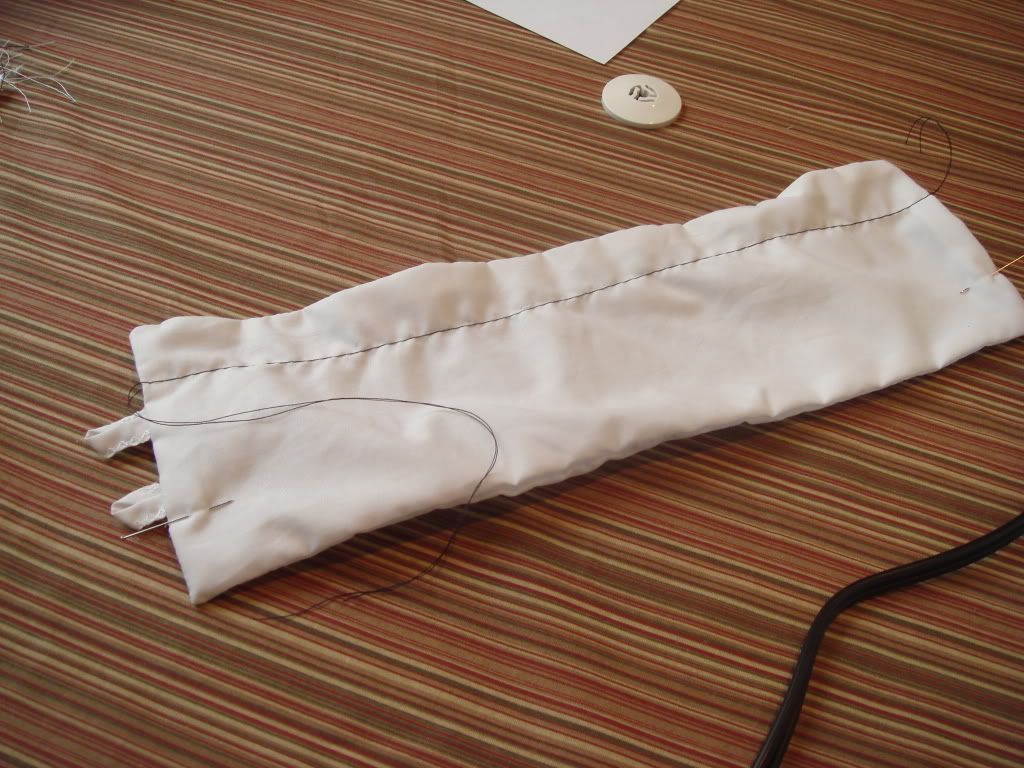
Then I hand-stitched the small opening I left open, closed.

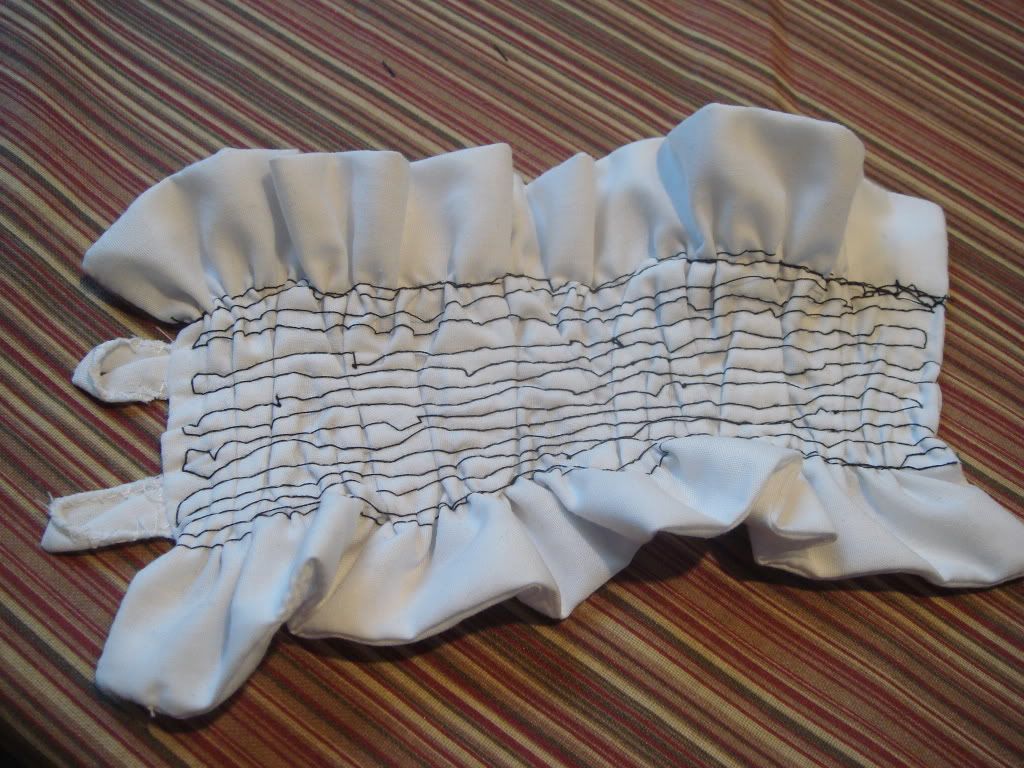
Here's where I switched to my black thread. I loosened the thread tension a little, and took the stitch length all the way up. I sewed a line just above the first 'loopy', at 1'' down.
Then I did the same just below the lower 'loopy', and ruffled it! I kept putting it around my wrist to make sure it wasn't too short. Better too long, then too short. Once it was a good size I tied off my 'ruffle strings' and trimmed 'em.
Here was the fun part for me!
I tried out my 'free motion foot' for the first time! Did I mention this is a new sewing machine? And that I LOVE it?! Singer Quilter's Confidence, in case you're interested.
I tightened the tension a little tighter than the 'Auto' it's normally on.
Then I went to work going back in forth (with the black thread still), in a carefree kinda way, with the feed-dog down. I wanted it to have a slightly...umm..what's the word? Rogue-ish look?
You don't have to have this foot to get this look, just use your regular presser foot and pivot at each end.

Here's after going back and forth in my 'free motion fashion'.
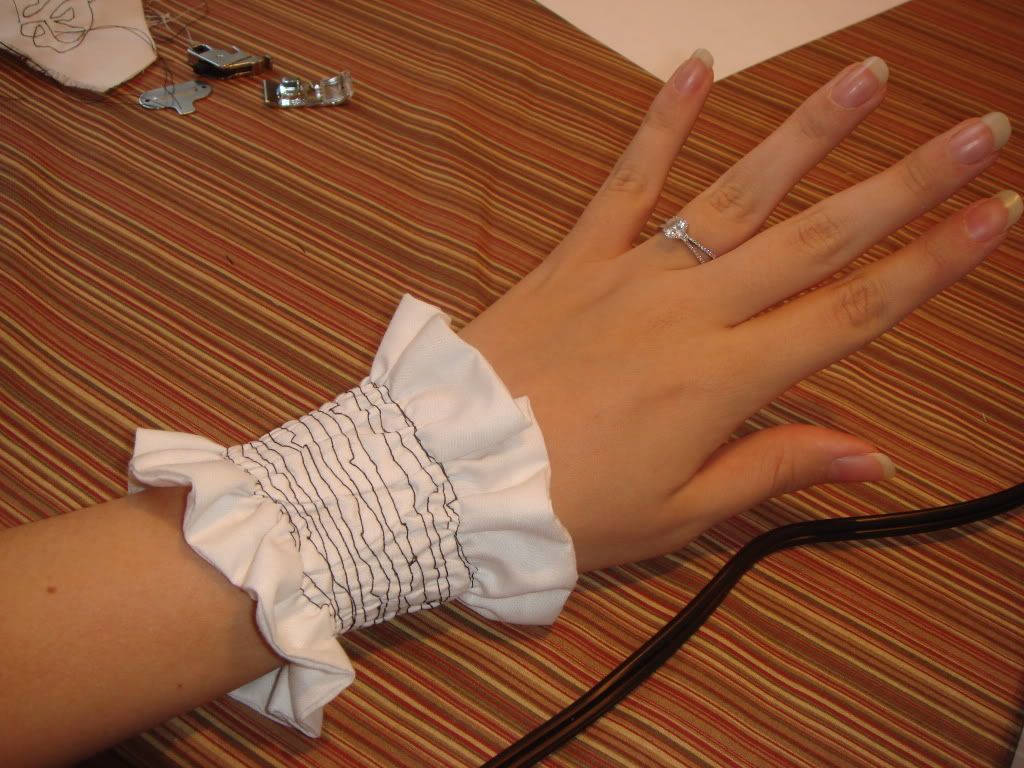
I know it doesn't look like anything super special, but like most great accessories you gotta put them on to get the whole effect, right?
Oh, and add both the buttons to the opposite end of the 'loopies'. If it's too long, just move the buttons back a bit.
Ooooh, I L.O.V.E. IT!
I then proceeded to make the second cuff, and a collar that was 14'' x 3 1/2'' (with 1/4'' seam allowance), with one 'loopy' and one button. Go off your own measurements though if you plan to make any. I have unusually small wrists. And I barely had any ruffle to my collar 'cause my scraps weren't any longer. But it turned out great!
Thanks for checking out Crafty Mamacita!
Now, take a break and go have yourself some pizza!
I know, graceful, huh? BUT, it's still elegant if you hold your pinky finger out. ;)

I'm linking up to:


Very cute, Crystal! You could make them to match every outfit :)
ReplyDeleteI'm inspired!
ReplyDeleteSo creative, girl!
Those are really cute!
ReplyDeleteLove them. Great idea. I'm starting a weekly linkup called Make it, Wear it. This would be perfect to link up. Stop on by!
ReplyDeleteTheTrainToCrazy.com
These are so pretty!! They turn any tee into a whole outfit. Brilliant!!
ReplyDeleteI linked to your tutorial on Craft Gossip Sewing:
http://sewing.craftgossip.com/tutorial-ruffled-cuffs-and-collar/2010/03/03/
--Anne